Reverse Applique Napkins
Hello and welcome to DAY 1 of Valentine's Mini-Week here on mon petit lyons!
Last year I made a table runner so I thought it would be fun to make some napkins to go with it*. Plus it's another great use for my favorite sewing aid - freezer paper!

Materials to make Four Napkins:
1.25 yard of Kona or other reversible solid in any shade of pink you'd like
1.25 yard of Linen (I used Essex)
coordinating thread
freezer paper
embroidery floss.
Step 1: Wash your fabrics. Really. Linen does not shrink at the same rate as cotton, and you don't want a funky napkin after it goes through the wash.
Step 2: Cut the Kona solid into four 19" squares & the Linen into four 17" squares.

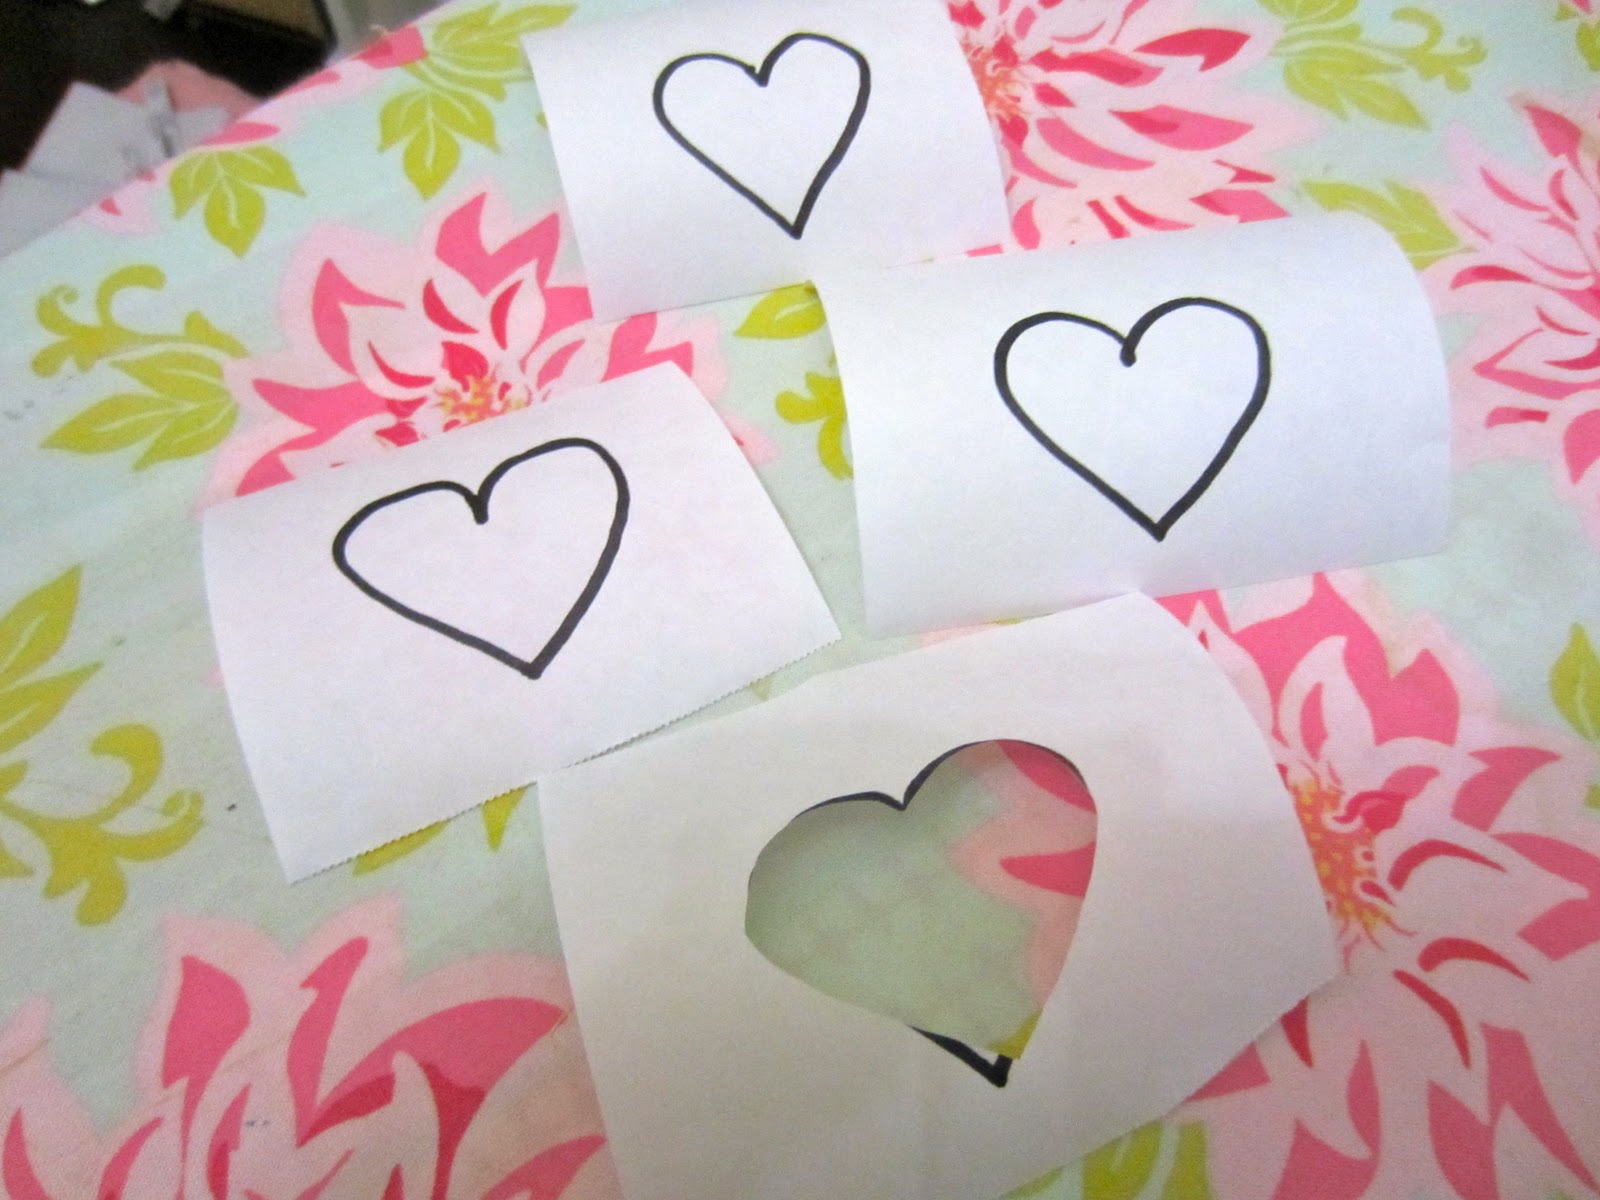
Step 3: Cut 4 squares of freezer paper, about 4" and draw a heart in the center. You can just do one if you plan on making these one at a time, having four helps if you want to do assembly line production. Now cut out the hearts, worrying about leaving the frame intact, not the heart. You can discard the heart centers.

Step 4: Iron the freezer paper, shiny side down, to a corner of your linen square to temporarily adhere it.

Step 5: Cut out a heart shape from your linen, inside the frame leaving about 5/8" all around. Clip the curves and corners towards the freezer paper.

Step 6: Now press the linen over the freezer paper frame. Turn over and press again.


Step 8: Remove your freezer paper. Center your linen sqaure on a pink square and pin around the heart and at the corners.

Step 9: Using a thread color to match the linen (I used pink in the bobbin so it wouldn't be noticeable on either side), topstitch around the heart, staying very close to the edge - about 1/8." If you are a perfectionist, you may want to do this by hand instead of machine, it's tough to get around the heart perfectly.


Step 10: Prepare the Self-binding by folding each side of the pink square down over the linen and then fold over again. Unfold as you come to a corner so that you have creases at each corner. Clip the top section off as shown:

Step 11: Make a nice corner by folding one side down twice and then folding the corner down, keeping the 45 degree angle, and continuing to fold the opposite side down twice. Sounds more confusing than it is, you may have to play a bit with where the fold is to get a nice corner. Your iron is your friend here, press often.


Step 12: Topstitch around the binding using coordinating thread, 1/8-1/4" from edge. Turn your corners with the needle down.

Step 13: You can be finished and have this:

OR
Get out your embroidery thread and add a little flair. So many possibilities! And, easy to bury your thread tail between the layers.

*had I actually thought to use the same Kona color I had used for the table runner binding, they might actually match - oh, well - lots of pinks!
I'm linking up today:
Last year I made a table runner so I thought it would be fun to make some napkins to go with it*. Plus it's another great use for my favorite sewing aid - freezer paper!

Materials to make Four Napkins:
1.25 yard of Kona or other reversible solid in any shade of pink you'd like
1.25 yard of Linen (I used Essex)
coordinating thread
freezer paper
embroidery floss.
Step 1: Wash your fabrics. Really. Linen does not shrink at the same rate as cotton, and you don't want a funky napkin after it goes through the wash.
Step 2: Cut the Kona solid into four 19" squares & the Linen into four 17" squares.

Step 3: Cut 4 squares of freezer paper, about 4" and draw a heart in the center. You can just do one if you plan on making these one at a time, having four helps if you want to do assembly line production. Now cut out the hearts, worrying about leaving the frame intact, not the heart. You can discard the heart centers.
Step 4: Iron the freezer paper, shiny side down, to a corner of your linen square to temporarily adhere it.

Step 5: Cut out a heart shape from your linen, inside the frame leaving about 5/8" all around. Clip the curves and corners towards the freezer paper.

Step 6: Now press the linen over the freezer paper frame. Turn over and press again.


Step 8: Remove your freezer paper. Center your linen sqaure on a pink square and pin around the heart and at the corners.

Step 9: Using a thread color to match the linen (I used pink in the bobbin so it wouldn't be noticeable on either side), topstitch around the heart, staying very close to the edge - about 1/8." If you are a perfectionist, you may want to do this by hand instead of machine, it's tough to get around the heart perfectly.


Step 10: Prepare the Self-binding by folding each side of the pink square down over the linen and then fold over again. Unfold as you come to a corner so that you have creases at each corner. Clip the top section off as shown:

Step 11: Make a nice corner by folding one side down twice and then folding the corner down, keeping the 45 degree angle, and continuing to fold the opposite side down twice. Sounds more confusing than it is, you may have to play a bit with where the fold is to get a nice corner. Your iron is your friend here, press often.


Step 12: Topstitch around the binding using coordinating thread, 1/8-1/4" from edge. Turn your corners with the needle down.

Step 13: You can be finished and have this:

OR
Get out your embroidery thread and add a little flair. So many possibilities! And, easy to bury your thread tail between the layers.

*had I actually thought to use the same Kona color I had used for the table runner binding, they might actually match - oh, well - lots of pinks!
I'm linking up today:


cute!!
ReplyDeleteThese are so cute!!
ReplyDeleteThese are so gorgeous, thanks for linking them up. I love your freezer paper embroidered hearts too, so pretty :-)
ReplyDeleteGreat tute! I'd love to make these someday!
ReplyDeleteHello just found you can i do the same with a 7by6 print of this dog its on cloth and then put the log cabin tiny strips around it on top, thanx so much for your ideas and like you site very much renee
ReplyDelete