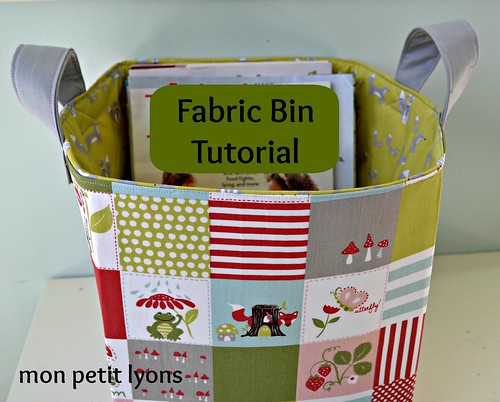
Fabric Bin Tutorial
Supplies:
1/2 yard of exterior fabric
1/2 yard lining fabric
1 yard of Pellon Peltex71F, single-sided fusible ultra firm stablizer
scraps of quilt batting (optional)
scraps for Peltex and coordinating fabric for handles (optional)
Coordinating thread, sewing machine, rulers, cutting mat, etc.
* A walking foot is not required, but it sure does make this easier!
**All seam allowances are 1/2"
*** The finished size is roughly a 10.5" cube. It is 11" tall, so not quite a perfect cube!

Step 1: Cut your lining and exterior fabric each into two pieces 17" tall by 22" wide (4 pieces total). Then cut a 5.5" square out of the bottom corner of each piece.

Step 2: Next cut your Peltex into two pieces 16" tall x 21" wide. My interfacing was only 15" wide, but that is okay, we can add a little 1" strip since this is fusible, I'll show you in the next step. Then cut the 5.5" squares out of the bottom corners.


Step 4 (Optional): Cut two batting pieces 17" x 22" with the 5.5" corners cut out and spray baste or pin them to the wrong sides of your lining pieces. I found this gave the bin just a little more bulk, but if you don't have some batting scraps lying around I would not worry about this step. These pieces are not as stiff and bulky as the Peltex, so I did not bother cutting them smaller than the lining pieces like we did on the exterior pieces.
Step 5: With right sides together, sew exterior pieces together on two sides and bottom with a 1/2" seam allowance, locking your stitches in place by reversing at the start and stop of your seams. Ignore the corner cutouts for the moment and just make these three straight seams. Repeat with the lining pieces. Press all seams open.

Step 6: In the picture above you can see how the exterior fabric is now joined to almost make a box, we just need to sew up the corner pieces. To do this match the bottom seam up with one side seam and pin. Sew across this line with a 1/2" seam and repeat for the other side, as well as on both lining corners. Turn the exterior piece right sides out, but leave the lining piece wrong sides out.

Step 7: Spend a moment with your iron and press everything nicely. I like to press a crease in from each of the four bottom corners going up to the top of the bin as shown below.

Now press the top of the fabric down 1/2" over the interfacing. Repeat for the lining.


Step 8: Place the lining piece inside the exterior and pin in place. Or use these handy little clover clips! If you don't want handles, all you need to do is topstitch around the edge.

Step 9 (optional): Make the handles by cutting two pieces of fabric 11" x 5.5" and two pieces of Peltex interfacing 1.5" x 10." Fuse the interfacing into place as shown and fold one long side over about an inch, then folding the short sides in 1/2."

Fold the remaining long side in toward the fusible piece, press and fold up. Your fabric should now completely encase the interfacing strip without any exposed raw edges. Top stitch all the way around and repeat for the other handle.

Pin your handles in place on either side of each side seam as shown.
Step 10: Topstich! Now just go all the way around the top of your bin, about 1/8 - 1/4" from the edge. When you get to a handle, sew across it, then with needle down turn to come diagonally across to the opposite bottom corner. Again, with needle down, turn to sew across the bottom of the handle (following the seam you made when you topstitched the handle) until you come to the corner, then turn and go back up, diagonally to the opposite top corner, making an "x" for added strength. Continue topstitching around your bin, repeating "x" stitching for the other three handle ends.

Step 11: Press everything nicely again! You can see I was rushing through making this to get the tutorial out and my cheater patchwork is not quite straight! Definitely something more noticeable with a geometric print...

If you don't happen to have any Peltex, there are a few other ways to make this sturdy. One is by layering interfacing/batting/canvas. Another is with heavy quilting. I would use a quilt as you go approach and start with a piece of canvas or home dec fabric (just for bulk, you won't see it) and layer it with batting and then your exterior pieces. Because the pieces tend to shrink with quilting, start with a piece a little big and trim it down to size. If I get ambitious I might add a little tutorial for this style.
I hope you enjoy this tutorial, if you end up making one I would love for you to add it to the petit lyons Flickr group! Thanks! xo, Courtney


Can you tell me how large the finished demensions are when the basket is finished
ReplyDeleteThis is si darling! Thank you for sharing your skill
ReplyDeleteU R the Best!!!!
ReplyDeleteCute, quick, and simple...perfect!
ReplyDeleteThis is fantastic! Thanks for the great tutorial!
ReplyDeleteThanks for the great tutorial.
ReplyDeleteWow, thanks for the great tutorial! It is so well written that even I should be able to make it. Fantastic!!!
ReplyDeleteYay! Bookmarking for future use! These will be great for all of the mini charm packs I'm accumulating!
ReplyDeleteThis is wonderful. Thanks for a tutorial.
ReplyDeleteThanks for the tutorial! I'm going to find that Pellon 71F~ ;)
ReplyDeleteThis makes so much sense, thank you
ReplyDeleteofficially added to my list of things to make! thanks for the tutorial!
ReplyDeleteThank you so much for writing and posting this... I've been threatening to attempt one of these for a while now, and this will make it much easier!
ReplyDeleteI've made 2 of these so far and a few smaller versions. Best fabric basket/bin tutorial and design I've found by far. Super-thanks!
ReplyDeleteI've made 2 of these so far and a few smaller versions. Best fabric basket/bin tutorial and design I've found by far. Super-thanks!
ReplyDelete