In case you missed - Patchwork Placemat Tutorial
This tutorial first appeared on Rachel's blog, imagine gnats, but I wanted to keep a copy of it here, too. Sorry for the repeat!
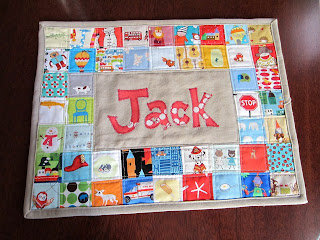
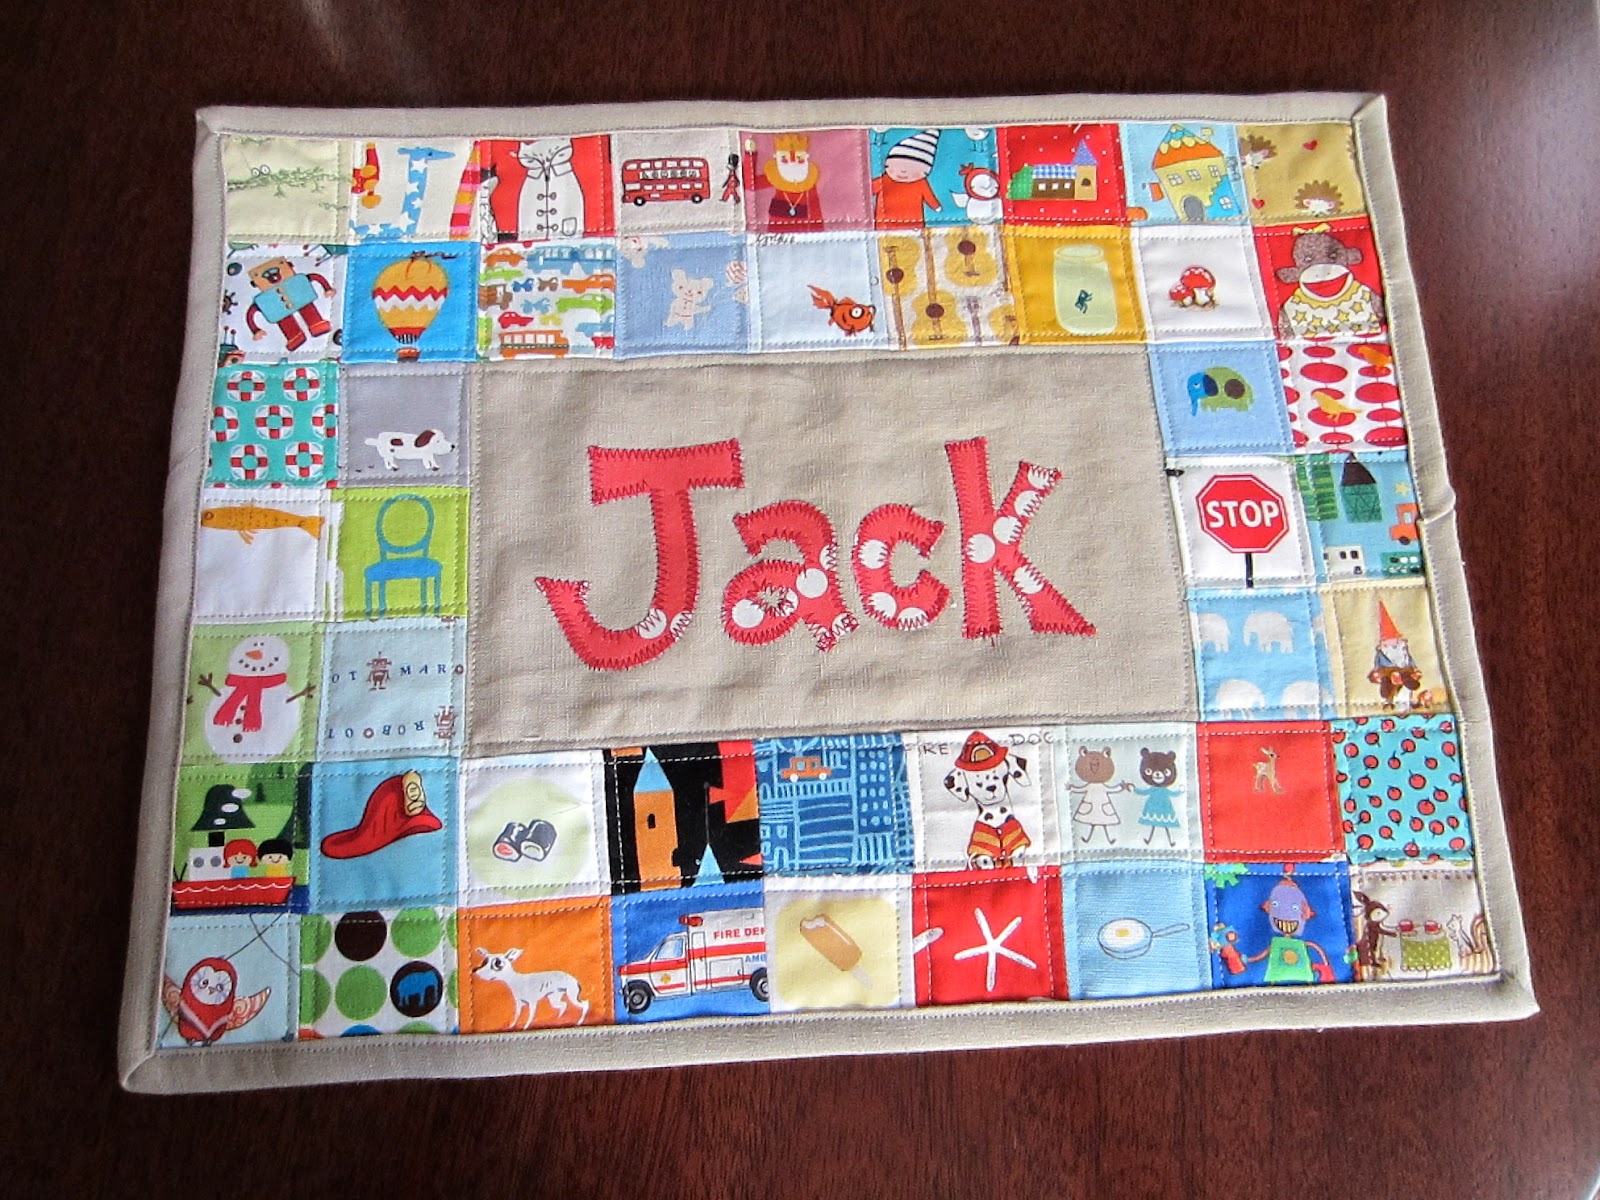
I have a fun little project for you today that was inspired by this cute table runner on flickr. A patchwork placemat!
I fussy cut novelty boy fabrics to get an I Spy effect, but this could be cute with fabrics from one line (you can cut from a charm pack) or in a pretty color palette with scraps from your stash.


Step 6: Iron the front and back of your placemat and prepare a quilt sandwich with backing, batting and front. I used Quilt Basting Spray, but you can baste with safety pins if you prefer.


Step 8: Trim your finished sandwich to prepare for binding.


I have a fun little project for you today that was inspired by this cute table runner on flickr. A patchwork placemat!
I fussy cut novelty boy fabrics to get an I Spy effect, but this could be cute with fabrics from one line (you can cut from a charm pack) or in a pretty color palette with scraps from your stash.
For this project you will need:
48 2" squares
1 piece of linen or solid color fabric 8.5" x 5"
2 strips of linen or solid width of fabric x 2.25 (or whatever size you like to make your binding from)
scrap of fabric in a solid or mostly solid for the name (approx 5 x 8")
heat n' bond
batting 12x16"
backing fabric 12x16"
coordinating thread

Step 1: Cut everything out according the the dimensions listed above.
Use your iron to fuse heat n' bond onto the back side of the fabric
scrap for the applique name. Draw your name in erasable pen or similar
marking instrument. Peel the paper off the back, cut out the name and
position it on the 8.5" x 5" piece of linen, keeping in mind you will
lose 1/4" all around from your seams. Fuse in place with iron.
Step 2: Zig Zag stitch around the edges of the letters to secure them. I start on a straight edge, like below, and with needle down turn on the corner. I like to start and stop with a straight stitch with a very small length (like less than .5) to secure the thread.


Step 3: Now layout your 2" blocks around the name piece. You will have two rows above and below the name, each 9 blocks wide and three rows of blocks 2 blocks wide on either side.
Step 4: Once you have a layout you like, you need to join your blocks with a 1/4" seam.

I like to do this by joining them in fours first, finger pressing the seams open, and then joining them by matching up all the seams. Having the seams pressed open really helps with lining them up.


Step 5: Now join your name block to the 3x2s on each side and then then add the top and bottom (2 x 9's).

Step 6: Iron the front and back of your placemat and prepare a quilt sandwich with backing, batting and front. I used Quilt Basting Spray, but you can baste with safety pins if you prefer.

Step 7: Now you are ready to quilt. Of course, feel free to use any method or pattern you choose. I decided to do straight lines 1/4" from all my seams. I try to avoid any seam endings to worry about tucking loose ends of the thread, so I quilted towards the center and turned back by stitching in the ditch to hide my stitches.

Step 8: Trim your finished sandwich to prepare for binding.

Step 9: Bind with the linen in the method you prefer. I figured there were enough binding tutorials out there already : )
Step 10: Admire your work!

I hope you enjoyed this tutorial! Rachael, I hope you are having a wonderful honeymoon. Thanks for letting me stop by!
-Courtney


Super cute!! I might have to give this a try!!!
ReplyDeletestill love it!!
ReplyDeleteAdorable! Thanks for the tutorial.
ReplyDeleteStill love it too!
ReplyDelete