Courthouse Steps on Point {A Quilt Block Tutorial}
Several months ago I ran across a photo of a vintage quilt that had Courthouse Steps blocks and I fell in love. The blocks appear to be on point and after a quick search came back empty I took the easy route and made up my own measurements. Having the blocks on point makes them easier to square up and faster to sew than having a few more layers of strips, so this makes a great bee block.
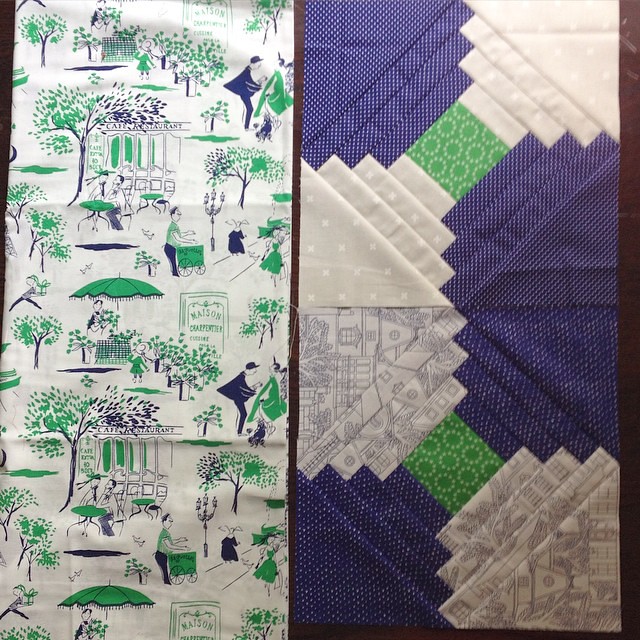
It's my turn to be quilter for Haven Do. Good Stitches in August, and this block fell perfectly into my plan to make a Kate Spade-esque quilt with this awesome Michael Miller backing fabric.
Here's what you need to make your own 12.5" (unfinished) block:
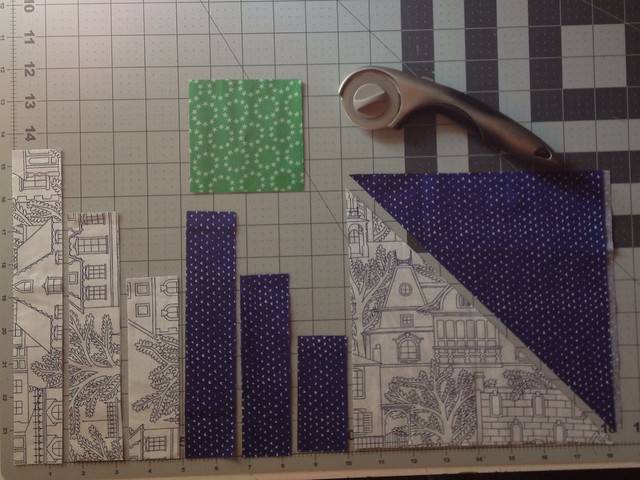
Fabric A - a pair of 1.5" strips in each size (3.5", 5.5" and 7.5") and one 8" square, cut on the diagonal
Fabric B - a pair of 1.5" strips in each size (5.5", 7.5" and 9.5") and one 8" square, cut on the diagonal
Fabric C - One 3.5" square for center
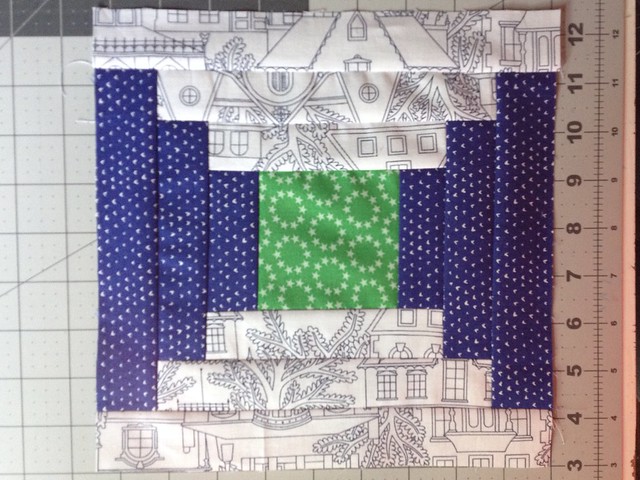
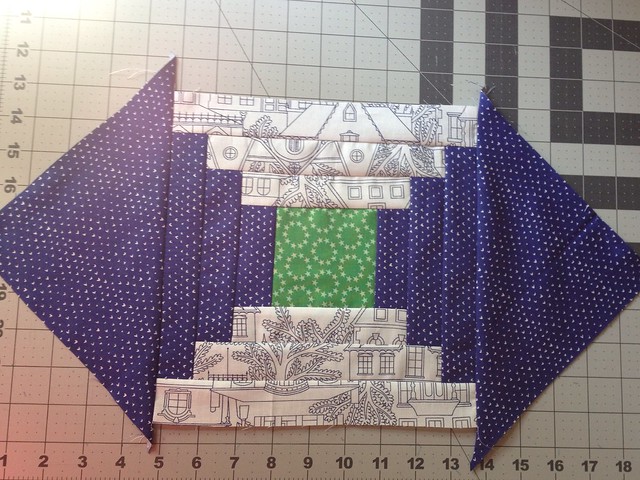
Begin by attaching the strips to your center block, starting with the shortest strips (3.5x1.5"). Unlike in a Log Cabin Block, where you move clockwise around the central block, you attach the strips on opposite sides. I found it helpful to press seams out from the center.
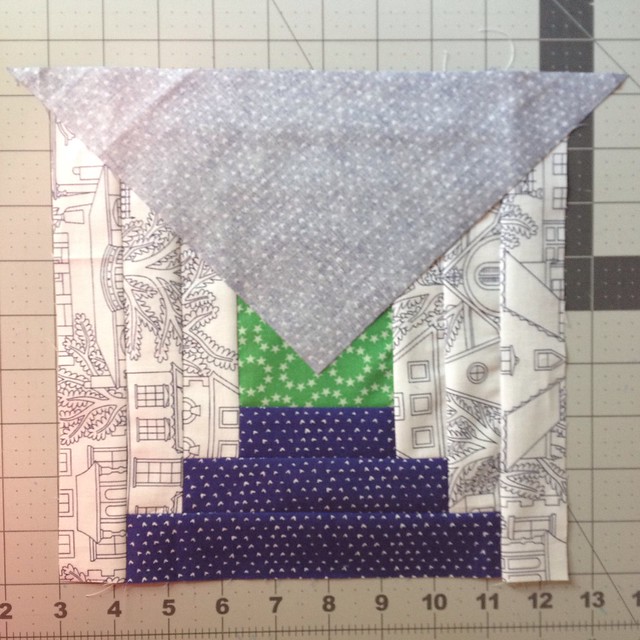
Now it's time to attache the triangles and put this baby on point. Start with the triangles in fabric A (the navy hearts in the photo). line them up so the point is centered on the central square. Pin, sew, press and repeat on the opposite side.
Now we will trim the points off so that there is a clean line to sew on for the remaining two sides. Sew the triangles on in the same manner as the first two.
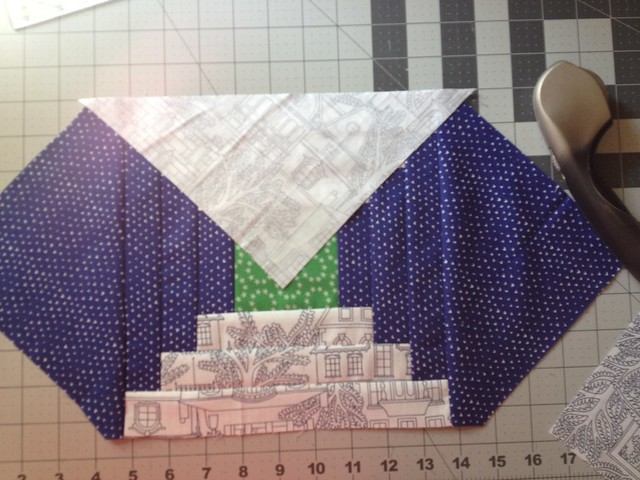
All finished with the sewing, now we just need to square it up and trim.
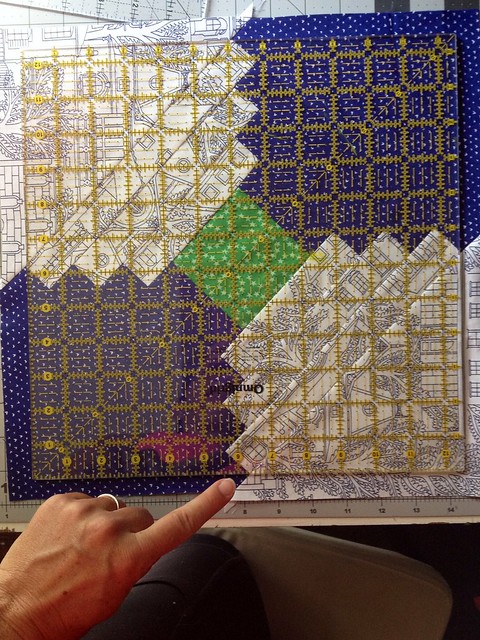
Place a 12.5" square ruler over the block. The center of the green square should intersect the 6.25" vertical and horizontal lines on the ruler (you can use washi tape on your ruler if you need a more defined line). Can you see the spot I am pointing to above? The ruler should also line up with this point on all four sides, or pretty close. Hold your ruler down firmly so that it does not shift as you trim the four sides.
I hope you enjoyed this tutorial and if you make something from it, I'd love to see it in my flickr group. Thanks!
Here's what you need to make your own 12.5" (unfinished) block:
Fabric B - a pair of 1.5" strips in each size (5.5", 7.5" and 9.5") and one 8" square, cut on the diagonal
Fabric C - One 3.5" square for center
Begin by attaching the strips to your center block, starting with the shortest strips (3.5x1.5"). Unlike in a Log Cabin Block, where you move clockwise around the central block, you attach the strips on opposite sides. I found it helpful to press seams out from the center.

All finished with the sewing, now we just need to square it up and trim.
Place a 12.5" square ruler over the block. The center of the green square should intersect the 6.25" vertical and horizontal lines on the ruler (you can use washi tape on your ruler if you need a more defined line). Can you see the spot I am pointing to above? The ruler should also line up with this point on all four sides, or pretty close. Hold your ruler down firmly so that it does not shift as you trim the four sides.
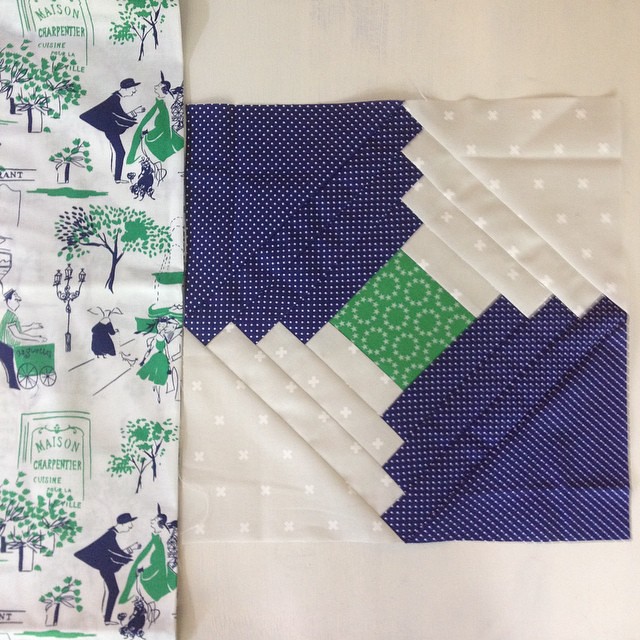
I love how they look together! I can't wait until the bee blocks start to arrive from my Haven Hivemates.
I hope you enjoyed this tutorial and if you make something from it, I'd love to see it in my flickr group. Thanks!

Oh...my a great tute from a busy mom. Thank you for all your support...hugs
ReplyDeleteIt's beautiful! Love the pattern and the colors you chose. Thanks for the tutorial - this will be a fun one to try!
ReplyDeleteThanks for this nice tutorial!
ReplyDelete